


A few bees under the floor
Posted on 12th February 2017 at 16:09
It starts with a phone call. "We want to renovate our stables. It seems we have a few bees under the floor. Could you come along and give us some advice, please?"
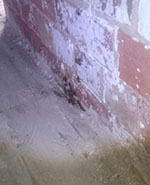
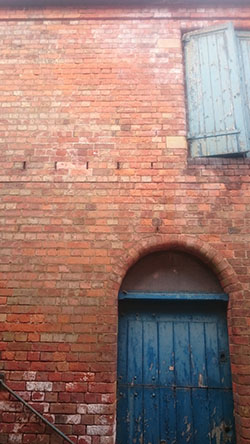
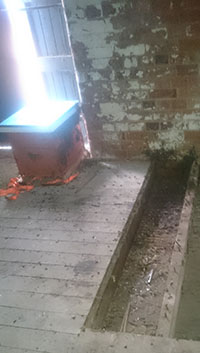
The stables turns out to be a Georgian stable complex. The floor in question is at first floor level. The colony entrance is an air vent 3m (12 foot) from the stable yard. Can you see the entrance? Second vent from the right
We look inside the stable door. The ceilings are finished in lime plasters. So we are not getting the bees out that way. I am taken round the building to the point where we are over colony. Its not hard to spot the colony from inside the building. There is space between the floor boards and the brickwork and some of the bees are milling around that gap. I take a look at the nails in the floorboards and figure out where the floor joists are and hope that the bees have chosen to make their home between just one set of joist. In my experience they usually do but expect the unexpected.
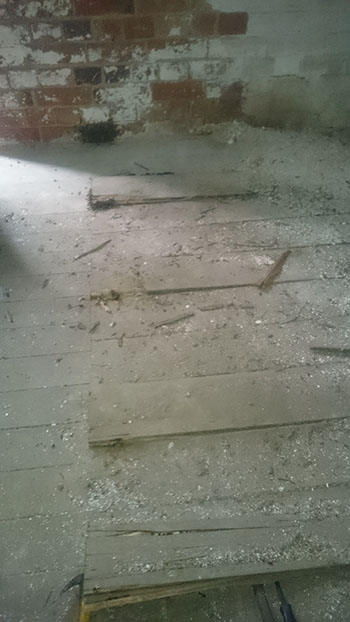
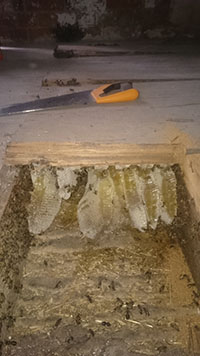
Picture left, First job is to work out how big the colony is. I lever up the third floor board from the wall, just enough to see if there are bees....yup, bees. OK, I go back other three boards. Same question, Bees? Answers, Yes. Ok another three boards, Bees? Errr, Yes. Other three boards Bees?, No. So twelve boards measuring six inches wide each gives a length for the colony of 6 feet (12 x 150mm = 1.8 meters). The twelfth board is removed to give room to get the saw in the cut the floor boards away to reveal the colony.
The timber of the building is riddled with wood boring insects and rot so much of the timber has to be replaced. The owners want the colony saved and allow me to cut away the floor boards to get at the colony.
Picture right. The bees have drawn their comb out parallel to the joists hung their comb from the underside the floor planks. They have completely filled a void between the floor, ceiling and joists. The wax is nice and white indicating new wax and it is filled with honey. I am please to say the bees are taking the disruption very well.
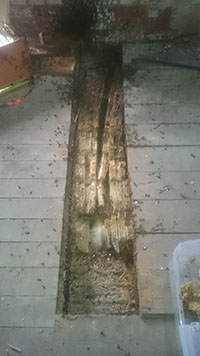
Picture left. All the planks have been removed to expose the colony. Even though it is mid July the inside of the building is quite cool. Its dark too, the only light coming from the access door which is rusted ajar. It is hot work sawing 1" (25mm) Oak floor boards in your beesuit. The bees are still well behaved but there are a lot of them in the air. The brood (eggs, larva and pupa) are in the comb near the wall. The honey is furthest away from the wall. Luckily I took a Langstroth hive with me. It is a large format hive and I had a large colony in front me. I took an empty frame and laid it next to the brood comb. I took my knife and cut down to release a piece of comb that fitted into the frame. I secured the comb in the frame with string and transferred it to the hive. I did this procedure over and over again until I ran out of brood to save. A Langstroth hive has ten frames. I filled seven with brood. The other three I filled with honey comb. Moving brood comb is a very delicate process because wax brood is very fragile. It supports a lot of weight when secured in the colony but picking it up and putting pressure in the wrong places damages the comb and the brood within it. I managed to save some honey comb into the super but that so heavy it is difficult to move without damaging the comb. Damage the comb and the honey spills everywhere. I put some empty frames in the super to give the bees some wax drawing to distract them and help establish themselves in the new surroundings.
In the time it took to save the colony I never saw the Queen. She had to be in there. The colony temperament and presence of eggs suggested she was. As I moved the comb I swept the bees off the comb. At Ieast I would not squish her accidentally in the transfer. When most of the comb was in the hive rather than under the floor the bees, as expected, started to cluster together, no doubt wondering where their home had disappeared. I used my dust pan and bee brush to sweep up the bees and then to place them on top of the frames in the hive. The bees naturally ran down between the frames into the hive. I did this a number of times until most of the bees where in the hive. I closed the hive with the crown board, on and on top of that a feeder which I topped up with syrup and finally the roof. The colony was now in a secure hive. To the bees the hive now smells much like the old underfloor colony. The young are there and many confused bees. They start to groom each other. The bees are covered in dust and spilt honey. Grooming helps the bees spread the Queen pheromones around the hive and they get security from that. I noticed that the bees where starting to centre on to the front of the hive rather than the old colony entrance. There were gangs of worker bees on the flight board fanning the scent from their Nasanov glands into the air. This was a good sign. I concluded I had the Queen and that all would be well. I swept up and left them to it for a few days.
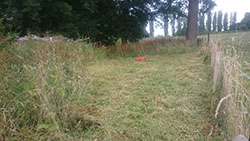
In the meantime I prepared the new apiary for the saved colony. It is a sheltered spot next to a meadow full of clover. after a week I returned the stables and checked in on the bees. The bees where happily going about their business. The syrup had all but disappeared. The inspection revealed the transferred comb had been secured with wax to the frames, new wax had been drawn and there were new eggs present. All the spilt honey had been cleaned up from the area of the old colony. I can safely say that colony has got a fighting chance to weather the winter.
I still haven't seen the Queen.
Share this post: